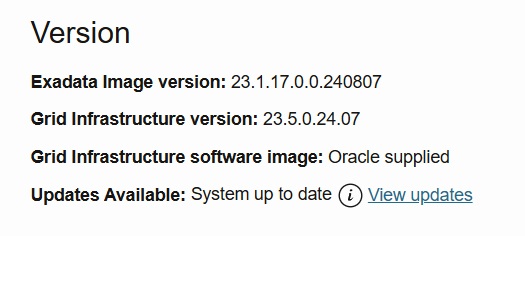
Recently I shared several posts about the process to upgrade the GI from 19c to 23ai at ExaCC. My last post summarizes a lot of this, please read it here. But as you know, to use the 23ai you need to be running with OEL 8, and for ExaCC, the upgrade is quite simple. The goal is to reach this, “no updates” and “System up to date”:
My environment
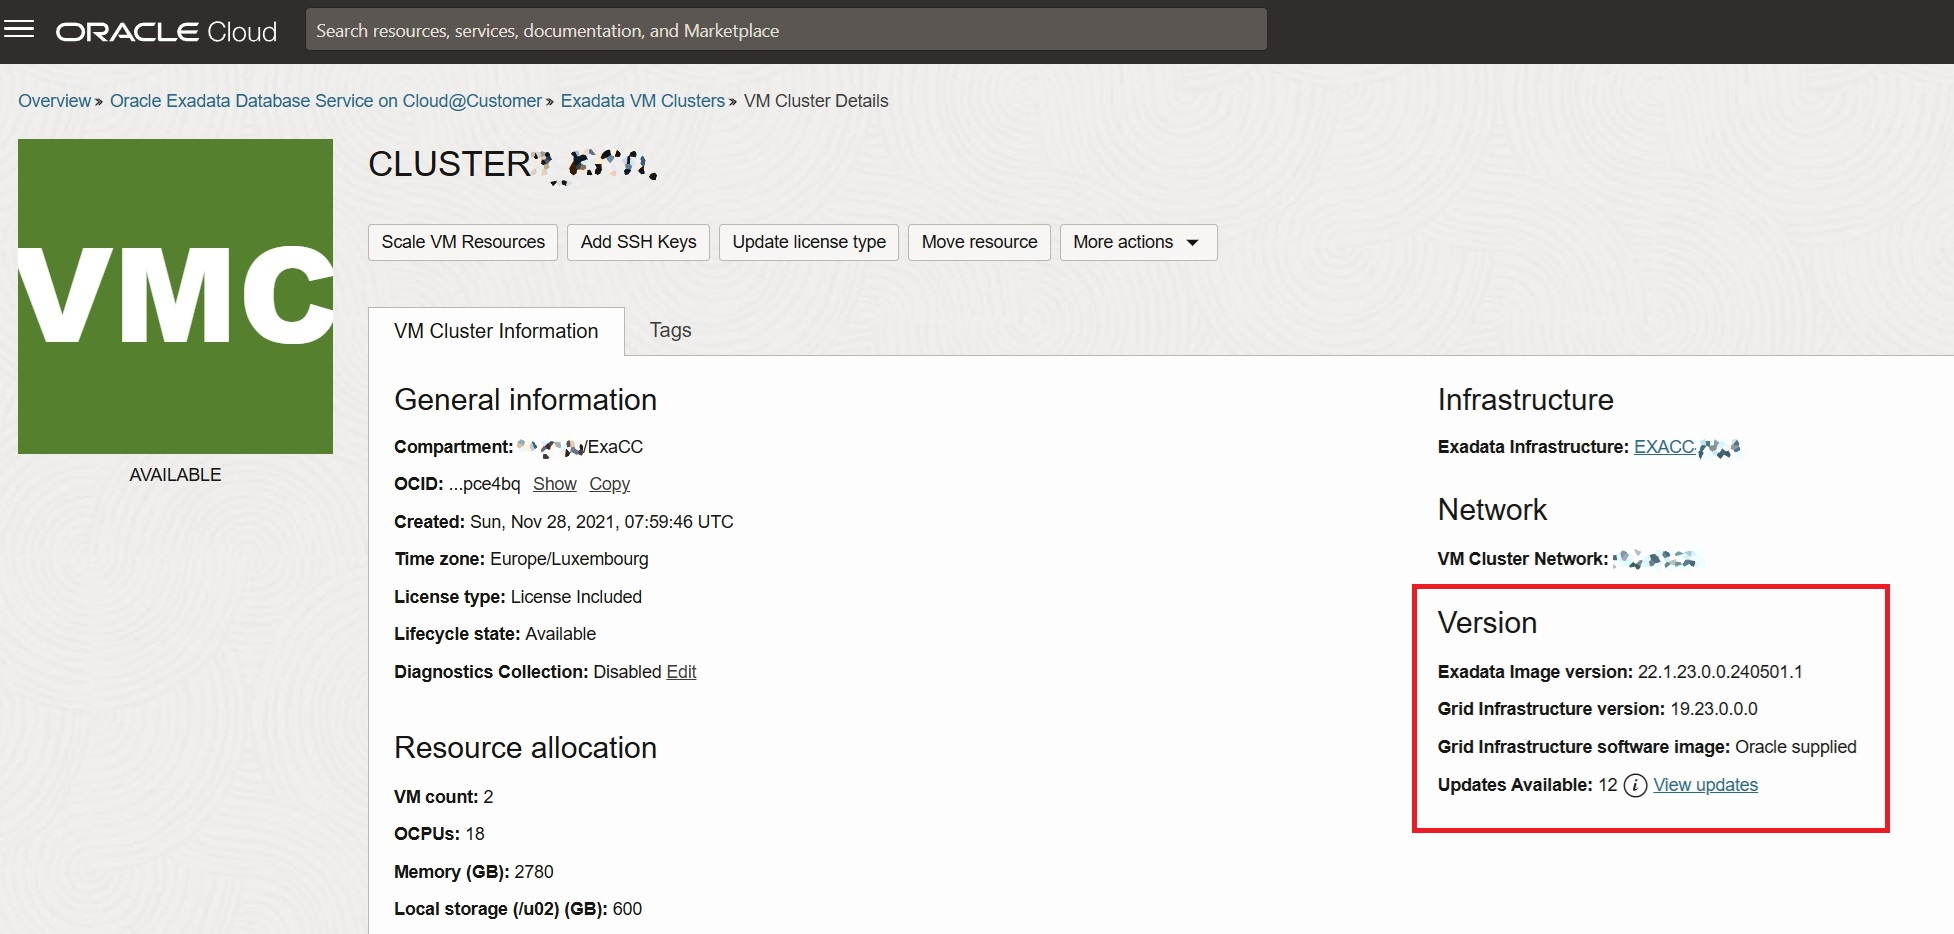
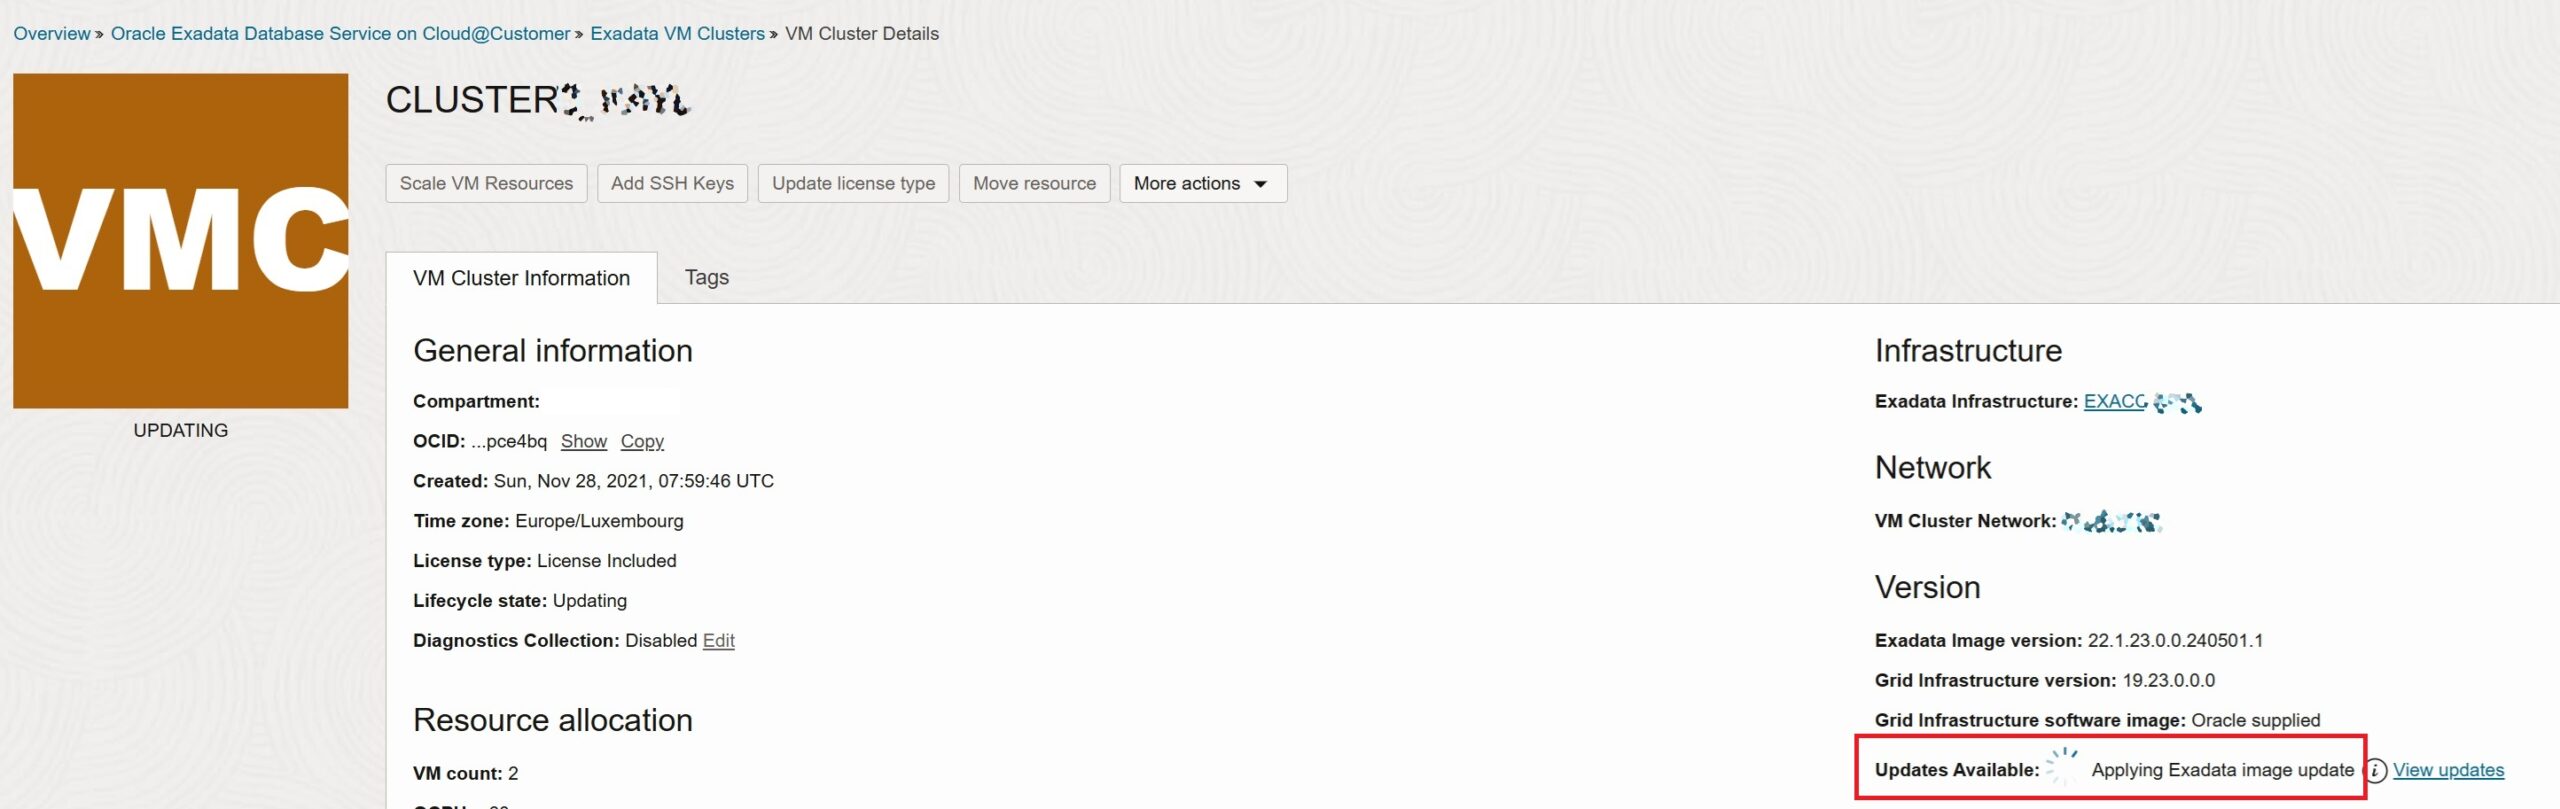
Here I have one cluster running at version 22.1.23.0.0.240501.1. You can see that this cluster already passed several upgrades and patches (including an upgrade from Exadata Image 21 to 22):
[root@exan01cl01 ~]# imageinfo

Kernel version: 4.14.35-2047.528.2.4.el7uek.x86_64 #2 SMP Tue Feb 27 20:52:58 PST 2024 x86_64
Uptrack kernel version: 4.14.35-2047.535.2.1.el7uek.x86_64 #2 SMP Mon Apr 1 13:45:56 PDT 2024 x86_64
Image kernel version: 4.14.35-2047.528.2.4.el7uek
Image version: 22.1.23.0.0.240501.1
Image activated: 2024-06-08 22:43:06 +0200
Image status: success
Node type: GUEST
System partition on device: /dev/mapper/VGExaDb-LVDbSys1

[root@exan01cl01 ~]#
[root@exan01cl01 ~]#
[root@exan01cl01 ~]# imagehistory
Version                              : 21.2.2.0.0.210720
Image activation date                : 2021-11-30 16:31:09 +0100
Imaging mode                         : fresh
Imaging status                       : success

Version                              : 21.2.4.0.0.210909
Image activation date                : 2021-12-07 10:09:44 +0100
Imaging mode                         : patch
Imaging status                       : success

Version                              : 21.2.14.0.0.220810
Image activation date                : 2022-10-02 10:35:10 +0200
Imaging mode                         : patch
Imaging status                       : success

Version                              : 22.1.7.0.0.230113
Image activation date                : 2023-02-05 10:16:18 +0100
Imaging mode                         : patch
Imaging status                       : success

Version                              : 22.1.11.0.0.230516
Image activation date                : 2023-07-09 11:43:38 +0200
Imaging mode                         : patch
Imaging status                       : success

Version                              : 22.1.18.0.0.231208
Image activation date                : 2024-01-24 19:08:01 +0100
Imaging mode                         : patch
Imaging status                       : success

Version                              : 22.1.23.0.0.240501.1
Image activation date                : 2024-06-08 22:43:06 +0200
Imaging mode                         : patch
Imaging status                       : success

[root@exan01cl01 ~]#


#####################
# Node 02
#####################
[root@exan02cl01 ~]#
[root@exan02cl01 ~]# imageinfo

Kernel version: 4.14.35-2047.528.2.4.el7uek.x86_64 #2 SMP Tue Feb 27 20:52:58 PST 2024 x86_64
Uptrack kernel version: 4.14.35-2047.535.2.1.el7uek.x86_64 #2 SMP Mon Apr 1 13:45:56 PDT 2024 x86_64
Image kernel version: 4.14.35-2047.528.2.4.el7uek
Image version: 22.1.23.0.0.240501.1
Image activated: 2024-06-08 23:22:56 +0200
Image status: success
Node type: GUEST
System partition on device: /dev/mapper/VGExaDb-LVDbSys1

[root@exan02cl01 ~]#
[root@exan02cl01 ~]#
[root@exan02cl01 ~]# imagehistory
Version                              : 21.2.2.0.0.210720
Image activation date                : 2021-11-30 16:31:08 +0100
Imaging mode                         : fresh
Imaging status                       : success

Version                              : 21.2.4.0.0.210909
Image activation date                : 2021-12-07 10:38:08 +0100
Imaging mode                         : patch
Imaging status                       : success

Version                              : 21.2.14.0.0.220810
Image activation date                : 2022-10-02 11:00:32 +0200
Imaging mode                         : patch
Imaging status                       : success

Version                              : 22.1.7.0.0.230113
Image activation date                : 2023-02-05 11:06:12 +0100
Imaging mode                         : patch
Imaging status                       : success

Version                              : 22.1.11.0.0.230516
Image activation date                : 2023-07-09 17:29:14 +0200
Imaging mode                         : patch
Imaging status                       : success

Version                              : 22.1.18.0.0.231208
Image activation date                : 2024-01-24 19:51:54 +0100
Imaging mode                         : patch
Imaging status                       : success

Version                              : 22.1.23.0.0.240501.1
Image activation date                : 2024-06-08 23:22:56 +0200
Imaging mode                         : patch
Imaging status                       : success

[root@exan02cl01 ~]#
And this is the same that you can get inside your ExaCC OCI Region:
Upgrade process
Here I will do the upgrade using the web interface of OCI, and the process is simple, Precheck, Fix Blocking Issues, and Upgrade.
Precheck
So, to do the precheck you just need to enter inside your cluster and check for the update, at the previous image you can see that we have updates to be applied:
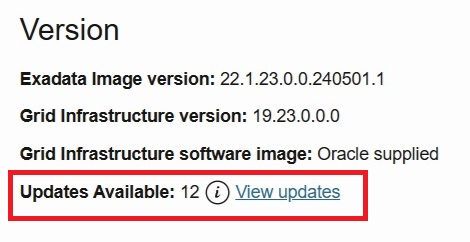
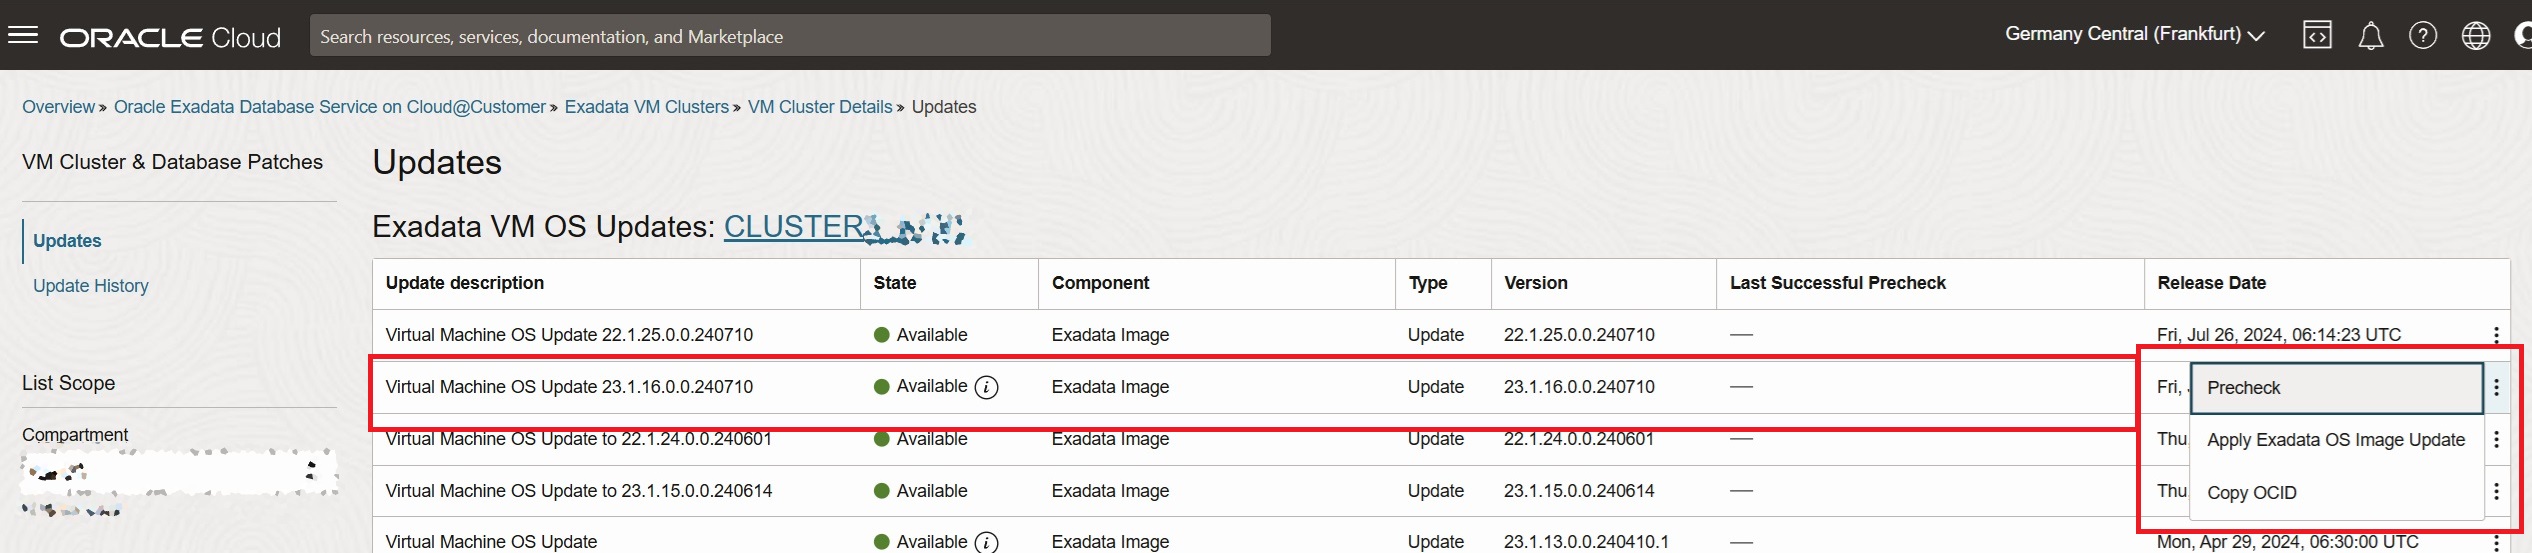
And after clicking on “View Updates” we can see the list of OS updates:
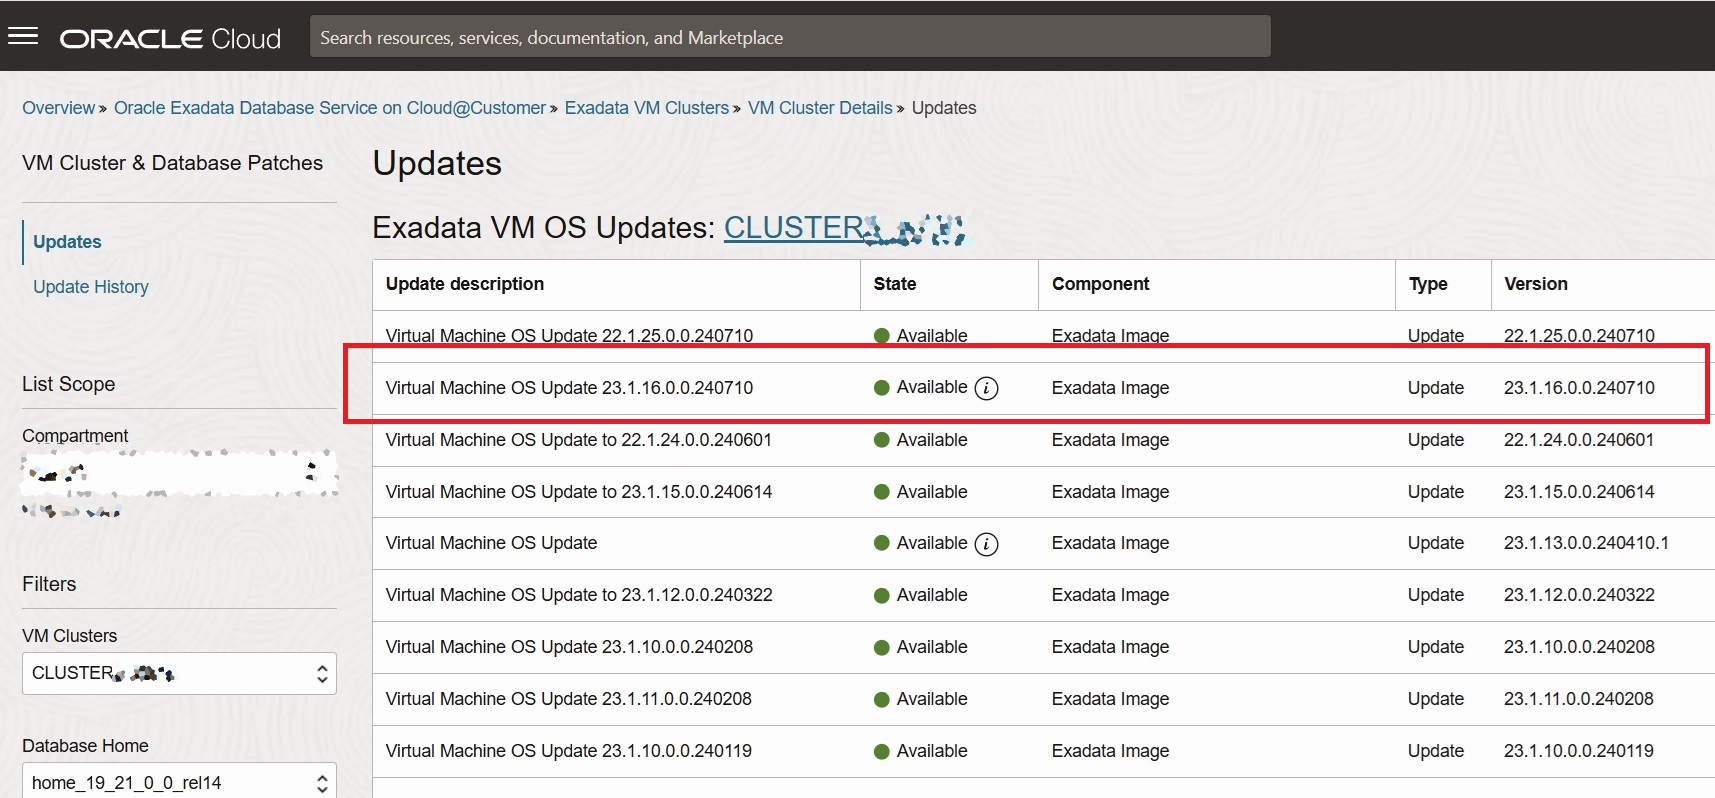
As you can see above we have the last Exadata image 23.16 available. This was the version available when I made the upgrade, days later they came with 23.1.17, and right after I installed the Exadata version 24.1 became available for ExaCC. It continues to be the OEL 8.
From the list you select the version that you want, and call the Precheck calling in the 3 dots at the right of the line and calling it:
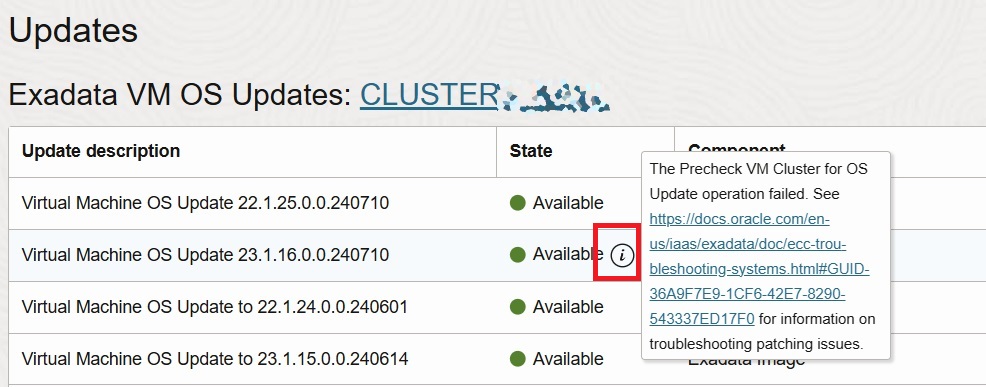
When you do that, one work request will be generated for this cluster, and you will get the result. If you get an error during the precheck you will see an icon “i” after the image version, and it tells you that failed:
But to see why it failed, you need to check the work requests for this cluster:

And clicking over it, you reach the work job page:

And you can click on the “Error messages” to get the root cause:
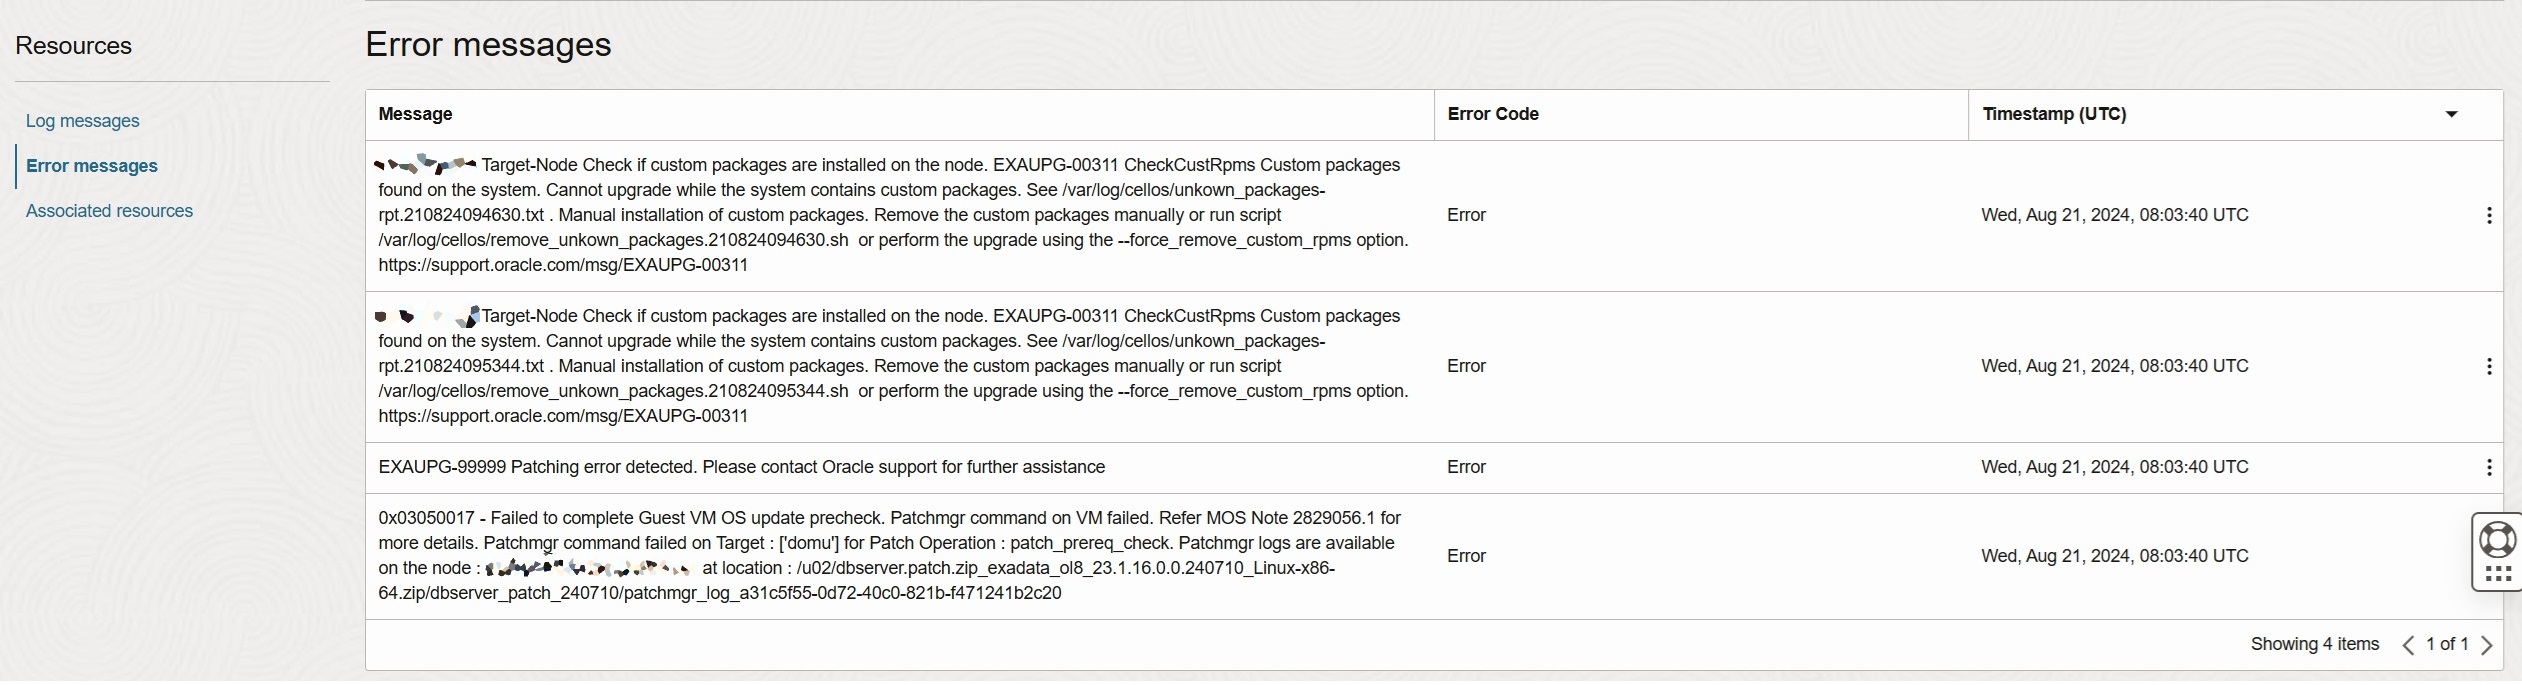
Basically, we have additional packages installed that block the upgrade. To discover we need to open the pointed text file and check what to do. So, going to the console and opening the file we discover which ones are blocking (the file in the image, and the one below are different because I made this for different clusters, but is easy to understand the point):
[root@exan01cl01 ~]# cat /var/log/cellos/unkown_packages-rpt.230824162305.txt
#################################################################################
# File initialized at 230824_162526 (runid :230824162305) by dbnodeupdate.sh 24.240813
# NOTE: This list contains rpms which are seen as custom rpms
#################################################################################
perl-Try-Tiny.noarch
dynamicscaling.x86_64
#################################################################################
# ALERT       : Custom packages found (see above)
#               These custom packages MUST be removed before proceeding a major Oracle Linux upgrade.
#               Run dbnodeupdate.sh with additional -R flag at update time to have these packages automatically removed - OR -
#               Run /var/log/cellos/remove_unkown_packages.230824162305.sh manually as root before re-running prereq check.
#
# RECOMMENDED : Let dbnodeupdate.sh remove the packages right after the mandatory backup by using the -R flag
# WARNING     : Removing custom packages may impact functionality
# NOTE        : When removed functionality is still required after the update, reinstall the rpm after the update
#################################################################################
[root@exan01cl01 ~]#
For ExaCC and Exadata OEL migration, these two packages are known issues and already described in the note “How to Update Exadata Database Service in Oracle Cloud to Exadata Image Version 23.x and Oracle Linux 8 (Doc ID 2936828.1)”.
For the dynamic scale package, in case you are using it, I recommend saving all the information before. Just a simple copy of the folder:
[root@exan01cl01 ~]# cd /opt
[root@exan01cl01 opt]#
[root@exan01cl01 opt]#
[root@exan01cl01 opt]# tar -czvf /tmp/dynamicscaling.tar.gz dynamicscaling
dynamicscaling/
dynamicscaling/dynamicscaling.bin
dynamicscaling/api_key/
dynamicscaling/api_key/oci_api_key.pem
dynamicscaling/api_key/oci_api_key_public.pem
dynamicscaling/plugin/
dynamicscaling/plugin/output_cpu/
dynamicscaling/plugin/output_cpu/local/
dynamicscaling/plugin/output_cpu/local/check_cpu_stats_a6b921840de101cdb9947a32dae406a5
dynamicscaling/plugin/output_cpu/remote/
dynamicscaling/plugin/output_cpu/remote/check_cpu_stats_f31c7b5ddce80512375150b7c27d3098
dynamicscaling/plugin/cpu_usage_old
dynamicscaling/plugin/cpu_usage
[root@exan01cl01 opt]#
This will allow (in case needed) restore any needed information (like keys) from the CPU dynamic scale.
So, to remove the “perl-Try-Tiny”, simple rpm -e solves the issue:
[root@exan01cl01 ~]# rpm -e perl-Try-Tiny
[root@exan01cl01 ~]# rpm -qa | grep perl-Try-Tiny
[root@exan01cl01 ~]#
To remove the CPU dynamic scale you stop the service and remove it:
[root@exan01cl01 ~]#  systemctl stop dynamicscaling.service
[root@exan01cl01 ~]#
[root@exan01cl01 ~]# /opt/dynamicscaling/dynamicscaling.bin status

│▒▒▒▒▒▒▒▒▒▒▒▒▒▒▒▒▒▒▒▒▒▒▒▒▒▒▒▒▒▒▒▒▒▒▒▒▒▒▒▒▒▒▒▒▒▒▒▒▒▒▒▒▒▒▒▒│
 Dynamicscaling for ExaCC & ExaCS - Version: 2.0.1-23
 Copyright (c) 2020-2022 Oracle and/or its affiliates.
----------------------------------------------------------
 Author: Ruggero Citton <ruggero.citton@oracle.com>
 RAC Pack, Cloud Innovation and Solution Engineering Team
│▒▒▒▒▒▒▒▒▒▒▒▒▒▒▒▒▒▒▒▒▒▒▒▒▒▒▒▒▒▒▒▒▒▒▒▒▒▒▒▒▒▒▒▒▒▒▒▒▒▒▒▒▒▒▒▒│

Dynamicscaling is not running
[root@exan01cl01 ~]#
[root@exan01cl01 ~]# rpm -e dynamicscaling
[root@exan01cl01 ~]#
After that, we can call the precheck again and you will see that was OK:

Additional Prechecks
I recommend doing a little check before you continue with the upgrade, that is checking the running query over the rpm database. Sometimes, for some unknown reason, a lock is the help of the rpm database and several processes remain running, as you can see below:
[root@exan01cl01 ~]# ps -ef |grep rpm
root      57563  57361  0 15:48 pts/1    00:00:00 grep --color=auto rpm
root     108639      1  0 Jul10 ?        00:00:00 /bin/sh -c export LC_ALL=en_US.UTF-8;rpm -qa | grep dbaastools | grep -v atp
root     108649 108639  0 Jul10 ?        00:00:00 rpm -qa
root     161350      1  0 Jul15 ?        00:00:00 /bin/sh -c export LC_ALL=en_US.UTF-8;rpm -qa | grep dbaastools | grep -v atp
root     161355 161350  0 Jul15 ?        00:00:00 rpm -qa
root     162031      1  0 Jul11 ?        00:00:00 /bin/sh -c export LC_ALL=en_US.UTF-8;rpm -qa | grep dbaastools | grep -v atp
root     162033 162031  0 Jul11 ?        00:00:00 rpm -qa
root     171790      1  0 Aug02 ?        00:00:00 /bin/sh -c export LC_ALL=en_US.UTF-8;rpm -qa | grep dbaastools | grep -v atp
root     171791 171790  0 Aug02 ?        00:00:00 rpm -qa
root     211460      1  0 Jul21 ?        00:00:00 /bin/sh -c export LC_ALL=en_US.UTF-8;rpm -qa | grep dbaastools | grep -v atp
root     211467 211460  0 Jul21 ?        00:00:00 rpm -qa
root     220436      1  0 Jul17 ?        00:00:00 /bin/sh -c export LC_ALL=en_US.UTF-8;rpm -qa | grep dbaastools | grep -v atp
root     220442 220436  0 Jul17 ?        00:00:00 rpm -qa
root     272157      1  0 Jul08 ?        00:00:00 /bin/sh -c export LC_ALL=en_US.UTF-8;rpm -qa | grep dbaastools | grep -v atp
root     272161 272157  0 Jul08 ?        00:00:00 rpm -qa
root     303545      1  0 Jul16 ?        00:00:00 /bin/sh -c export LC_ALL=en_US.UTF-8;rpm -qa | grep dbaastools | grep -v atp
root     303550 303545  0 Jul16 ?        00:00:00 rpm -qa
root     315593      1  0 Jul15 ?        00:00:00 /bin/sh -c export LC_ALL=en_US.UTF-8;rpm -qa | grep dbaastools | grep -v atp
root     315598 315593  0 Jul15 ?        00:00:00 rpm -qa
root     324370      1  0 Jul08 ?        00:00:00 /bin/sh -c export LC_ALL=en_US.UTF-8;rpm -qa | grep dbaastools | grep -v atp
root     324376 324370  0 Jul08 ?        00:00:00 rpm -qa
[root@exan01cl01 ~]#
[root@exan01cl01 ~]#
[root@exan01cl01 ~]# reboot

Remote side unexpectedly closed network connection
As you can see above, a lot of old “rpm -q” processes running. You can try to kill all of them, but I prefer to have a clean start, so, for this reason, I rebooted the node.
This is critical because the upgrade process follows the traditional Exadata patchmgr and this is rpm apply.
Another check is to guarantee that all your databases/pdb’s/services are up and running correctly. The upgrade process is in rolling mode, starting with node 01. So, it will relocate services from one node to another, stop databases, and upgrade and restart services. But while doing the stop and start it verifies if all services and pdbs come back up and running. If not, it will fail. So, I recommend that you test the relocation and stop/start of your databases before continuing the upgrade.
You can also save the .ssh/authortized_keys to have a backup in case it vanishes. You just need to save it from the root user.
The last one is to guarantee that you are in the latest releases of 22.1.x before calling the upgrade to Exadata image 23.1.x. If this is not the case, update to the latest 22.1.x before continuing.
Upgrade
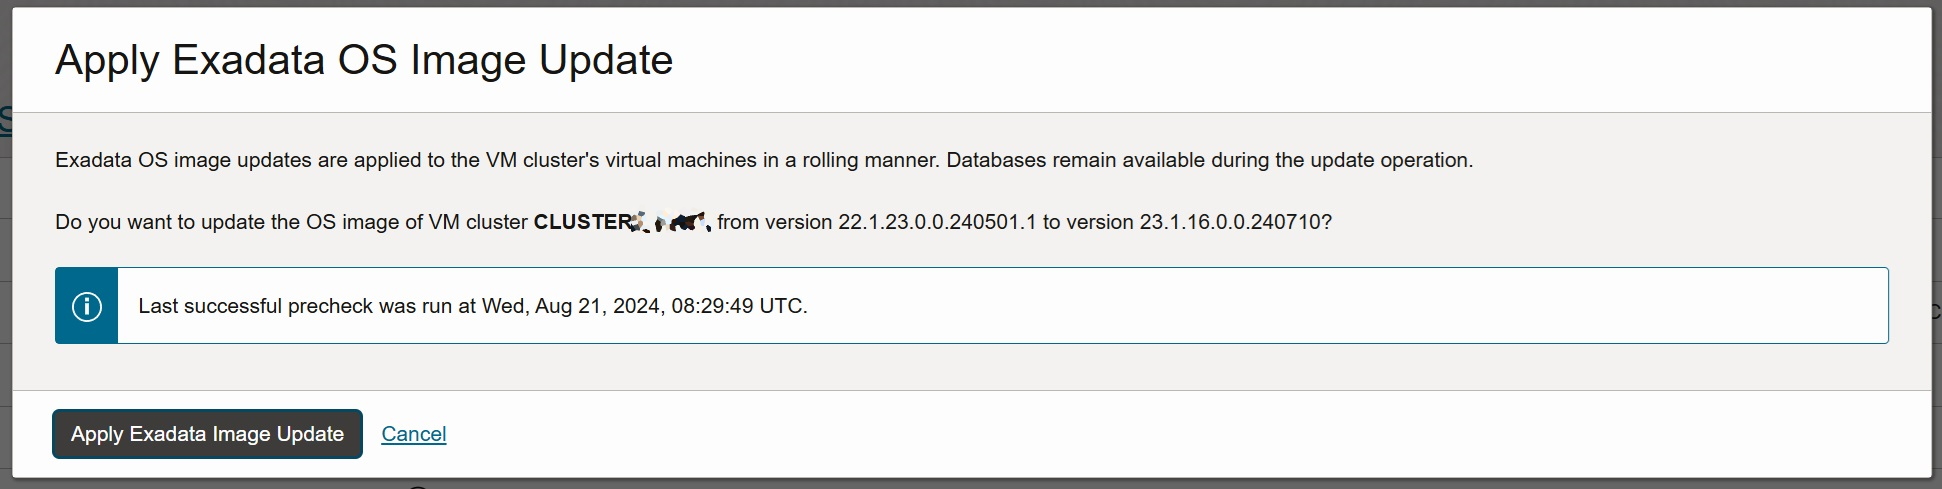
Since now the precheck was fine, we can now call the upgrade. This is calling the “Apply Exadata OS Image Update” option (at the same place that we called the Precheck):

It will double-check that you are Ok with the upgrade:
And is that, we follow up the process, the node will restart and you can see the patch in progress:
And after the image is applied, you can login again and check if the image was OK or not (below you can see that I already applied the image 23.1.17 in this case):
[root@exan01cl01 ~]# imageinfo

Kernel version: 5.4.17-2136.322.6.5.el8uek.x86_64 #2 SMP Sun May 5 16:58:14 PDT 2024 x86_64
Uptrack kernel version: 5.4.17-2136.333.5.el8uek.x86_64 #3 SMP Thu Jun 20 01:03:41 PDT 2024 x86_64
Image kernel version: 5.4.17-2136.322.6.5.el8uek
Image version: 23.1.17.0.0.240807
Image activated: 2024-08-24 17:47:37 +0200
Image status: success
Exadata software version: 23.1.17.0.0.240807
Node type: GUEST
System partition on device: /dev/mapper/VGExaDb-LVDbSys1

[root@exan01cl01 ~]#
[root@exan01cl01 ~]#
[root@exan01cl01 ~]# cat /etc/redhat-release
Red Hat Enterprise Linux release 8.10 (Ootpa)
[root@exan01cl01 ~]#
[root@exan01cl01 ~]#
[root@exan01cl01 ~]# imagehistory
Version                              : 21.2.2.0.0.210720
Image activation date                : 2021-11-30 16:31:09 +0100
Imaging mode                         : fresh
Imaging status                       : success

Version                              : 21.2.4.0.0.210909
Image activation date                : 2021-12-07 10:09:44 +0100
Imaging mode                         : patch
Imaging status                       : success

Version                              : 21.2.14.0.0.220810
Image activation date                : 2022-10-02 10:35:10 +0200
Imaging mode                         : patch
Imaging status                       : success

Version                              : 22.1.7.0.0.230113
Image activation date                : 2023-02-05 10:16:18 +0100
Imaging mode                         : patch
Imaging status                       : success

Version                              : 22.1.11.0.0.230516
Image activation date                : 2023-07-09 11:43:38 +0200
Imaging mode                         : patch
Imaging status                       : success

Version                              : 22.1.18.0.0.231208
Image activation date                : 2024-01-24 19:08:01 +0100
Imaging mode                         : patch
Imaging status                       : success

Version                              : 22.1.23.0.0.240501.1
Image activation date                : 2024-06-08 22:43:06 +0200
Imaging mode                         : patch
Imaging status                       : success

Version                              : 23.1.17.0.0.240807
Image activation date                : 2024-08-24 17:47:37 +0200
Imaging mode                         : patch
Imaging status                       : success

[root@exan01cl01 ~]#
Post-Upgrade
After that it is simple, we have applied the version and can reinstall (if needed) the CPU dynamicscale rpm, or any other that is needed.
The process, as you saw, is quite simple, we just check the precheck and after solving any issue, we apply the upgrade. And the upgrade process is not complex, or new thing. It is the same patchmgr/dbnodeupdate used for years at Exadata on-prem.
Disclaimer: “The postings on this site are my own and don’t necessarily represent my actual employer positions, strategies, or opinions. The information here was edited to be useful for general purposes, and specific data and identifications were removed to allow reach the generic audience and to be useful for the community. Post protected by copyright.”
Hello,
May I ask if this approach is applicable for EXACS? We would like to upgrade to exadata 22 to exadata 23 (oel 7 to oel 8) and follow this steps but we are EXACS not EXACC.
Hello,
I don’t think that will be possible for ExaCS.
Theorical yes, is possible. But I don’t know if is allowed by oracle.
Best regards.
Fernando Simon